Time needed: 15 minutes
Learn how to draw a heart shape using Inkscape for free.
-
New Document
Download Inkscape and open a new document.
-
Draw a Circle
Select the Circle tool and draw a circle. Hold down the Control button as you click and drag the cursor to draw a perfect circle.
-
Draw a Rectangle
Draw a rectangle that is the same height as the circle and half its width.
-
Align and Distribute
Select "Align and Distribute…" from the Object menu. Align the two shapes along their right edges and centered vertically.
-
Convert to Paths
With both objects selected, choose "Object to Path" from the Path menu.
-
Cut the Circle in Half
With both objects still selected and the rectangle sitting above the circle, select "Path" > "Difference" to cut the circle in half.
-
Duplicate
Duplicate the half-circle.
-
Draw a Square
Draw a square with the same height and width as the circle.
-
Assemble the Pieces
Arrange the two half-circles and the square into a heart shape and select "Union" from the Path menu.
Inkscape is a free vector graphics editor, similar to Adobe Illustrator, just without a few bells and whistles. The free, open source editor can accomplish a lot, though. Today, we’re going to learn how to draw a heart using Inkscape.
Running a small business often means finding free alternatives to otherwise pricey tasks. Inkscape is a great alternative to Illustrator, and many tasks can be completed quickly.
First, download Inkscape and open a new document.

Select the Circle tool to draw an ellipse, or circle. Hold down the Control button as you click and drag the cursor to draw a perfect circle.

Next, draw a rectangle that is the same height as the circle and half its width. Align the two shapes along their right edges and centered vertically. (You can align objects by selecting “Align and Distribute…” from the Object menu.)

Both objects are currently classified as shapes, but we need to convert them both to paths for the next steps. With both objects selected, choose “Object to Path” from the Path menu.

With both objects still selected and the rectangle sitting above the circle, select Path > Difference to cut the circle in half using the rectangle as the difference. The rectangle will disappear.

(If you do need to rearrange the order of your objects, use the Raise and Lower tools in the Object menu.)
Here’s what we have so far:

Duplicate the half-circle (Edit > Duplicate) and flip it horizontally (Object > Flip Horizontal).

Now draw a square with the same height and width as the circle.

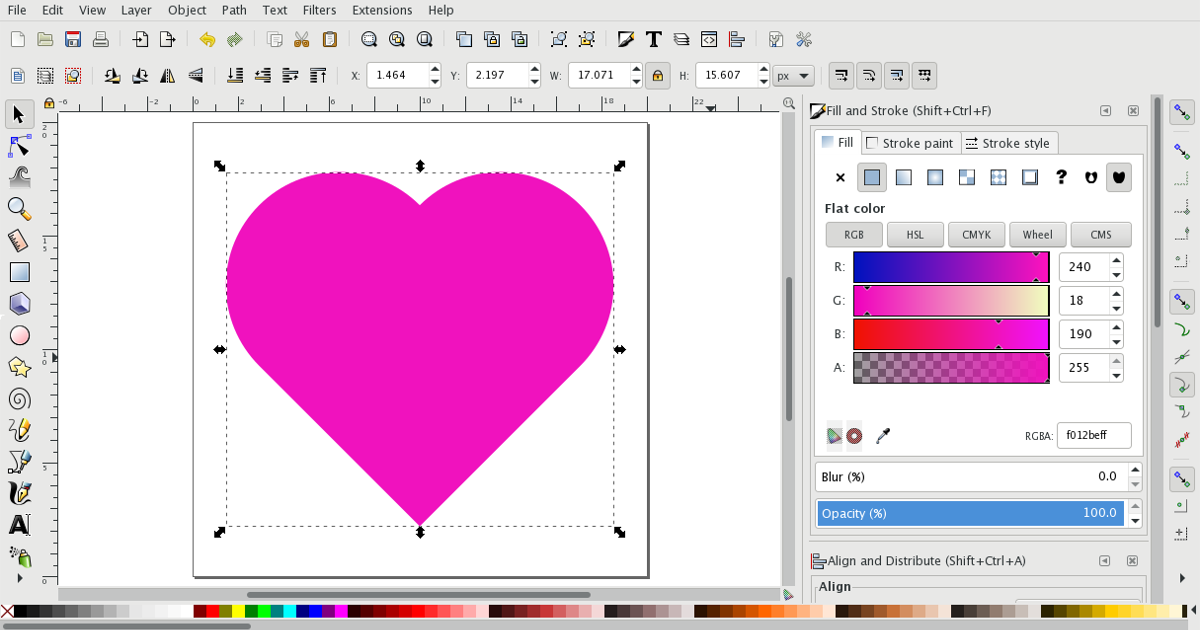
Arrange the half-circles and the square as shown below. It finally looks like a heart!

With all three shapes in place and selected, select “Union” from the Path menu. This merges all three shapes into one shape—a heart!

You now have a perfect heart shape that will scale infinitely and is easy to recolor. Simply rotate the heart 45° to stand it upright.

I hope you’ve enjoyed learning how to draw a heart in Inkscape. Keep designing!